


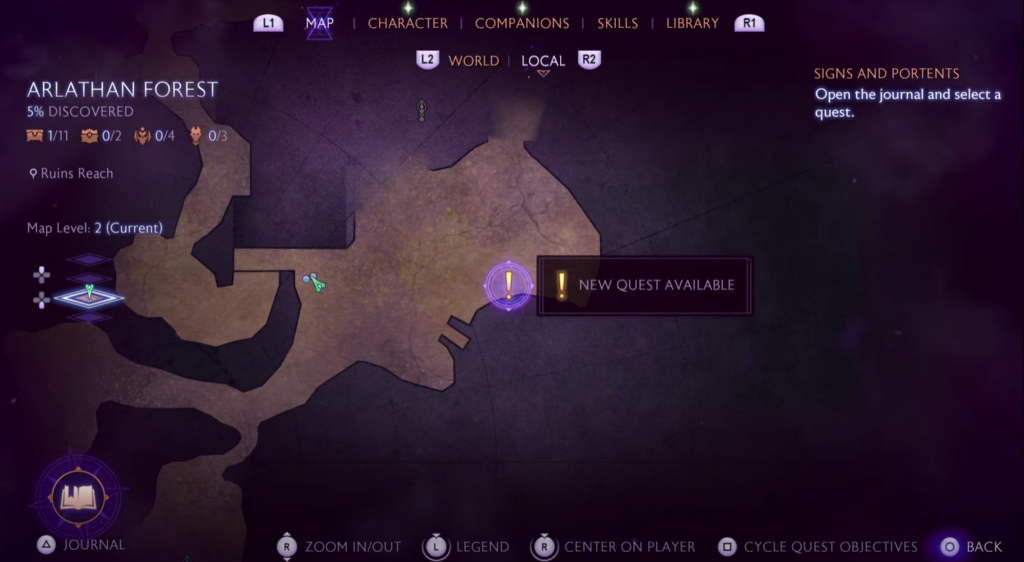
The Spirits of the Dalish side quest in Dragon Age: The Veilguard becomes available after finishing The Smuggled Relic Case main quest. After finishing this quest, head back to Arlathan Forest and you’ll notice an exclamation point on your map just south of the Veil Jumpers camp, marking a new available quest. Speak to the Anxious Spirit on the boat to obtain the Spirits of the Dalish side quest. Your new objective is to explore Arlathan Forest and uncover what happened to the Dalish elves by uncovering five mementos. Each discovery offers more insight into the unrest within the forest and the tragic fates than many elves have met. In this step-by-step guide, we’ll walk you through how to find each of the five mementos.
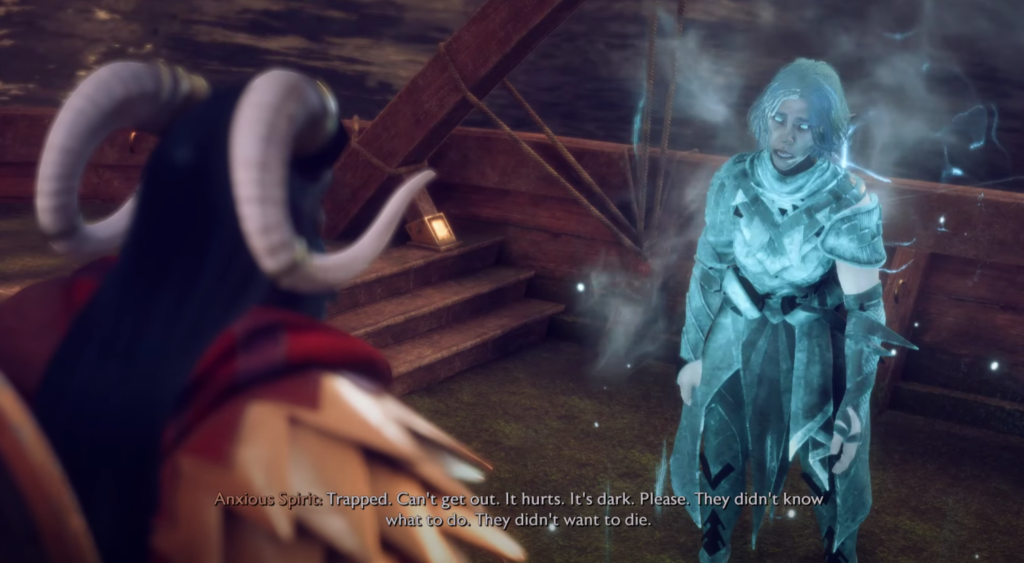
Speak to the Anxious Spirit
To start the Spirits of the Dalish side quest, speak to the Anxious Spirit on the boat. The spirit seems very distressed and Rook concludes that it might be upset because of the Dalish elves who recently died in the Arlathan Forest. The spirit pleads for you to help the other spirits.
First Memento
Starting from the boat where you just talked to the Anxious Spirit, turn around and take the path behind you up the hill. Once you pass the archway, turn right and use the fallen tree to cross the gap. On the other side, turn left and take the broken stone path up a short hill. The first memento will be in this area, but you’ll have to dodge falling rocks to get to it. A red circle appears right before the rocks hit the ground, so make sure to dodge them since they’ll do a good bit of damage.
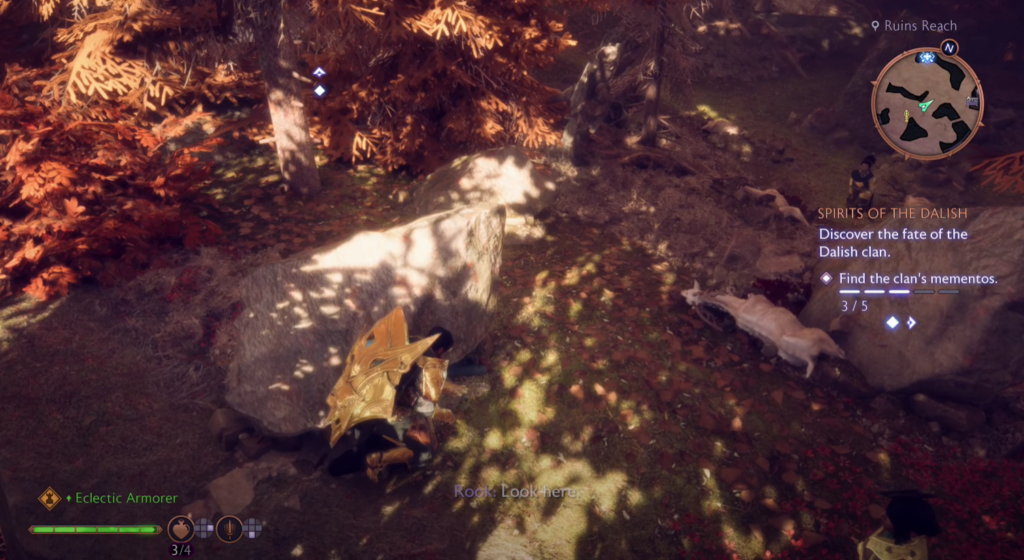
Head towards the small hill on your left, across from the giant tree. There’s a set of three boulders right by the drop-off. Investigate the furthest bolder and you’ll find the first memento, a Halla statuette, that the elf was holding when they died.
Second Memento
To find the second memento, head back the way you came and turn left. The path will take you to a statue of the Dread Wolf surrounded by trees. The memento is in this area, but keep an eye out for the Fade tear. When you get close to it, it will explode and do damage to anything within range. Dodge right before it explodes to get rid of it and avoid damage.
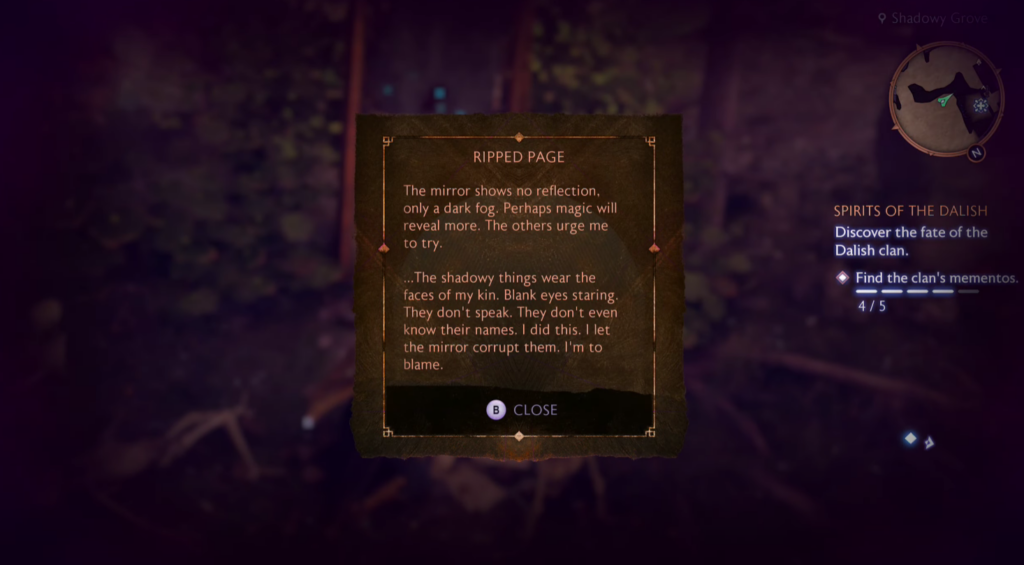
Head to the left of the Dread Wolf statue and you’ll find a broken Eluvian mirror. Interact with the skeleton in front of it to read the ripped pages littered on the ground and learn what it was doing with the mirror.
Third Memento
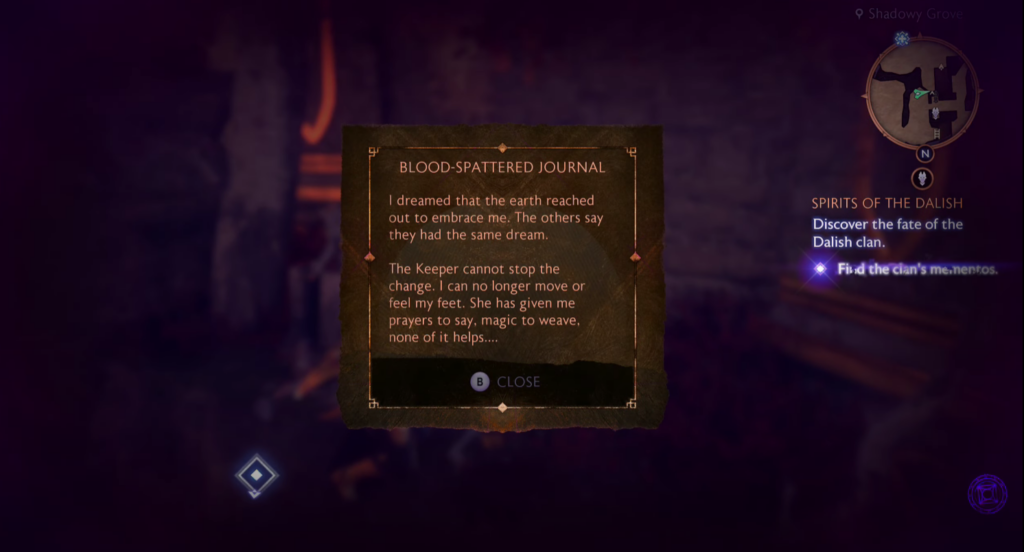
From the broken Eluvian, go back down the hill and turn left. You’ll quickly come to another fork in the road and you’ll want to make another left. Here, you will run across a couple of demons that need to be defeated. Once they’re dead, you can begin your search. This memento is one of the easiest to find since it has a smaller search radius. Just climb the short cliff straight ahead, or to the left of the archway, and interact with the blood-spattered journal. Here, you’ll read the final words of an elf as it was turned into a statue.
Fourth Memento
After you’ve collected the third memento, turn around and go back to the fork in the path. This time, take the other trail which will now be on your left. When you reach the water, turn right. In this area, you’ll have to fight multiple blighted creatures. Be wary of the ones with glowing red cysts on their heads. When they die, they explode and do damage to anything within range. There are also two larger blighted creatures that you have to kill.
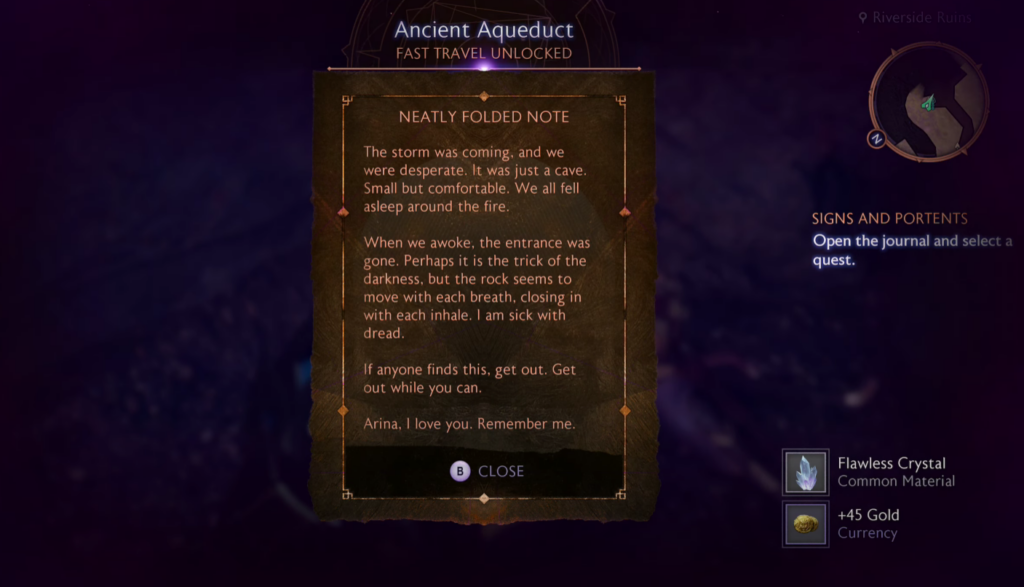
Once all four enemies are defeated, keep following the river’s edge. There is a cave to the right at the end of the path, but a Fade tear and fallen rocks block the entrance. Approach the Fade tear and the moment the ground lights up red, dodge out of the way. With the Fade tear and fallen rocks gone, you can now enter the cave and pick up the fourth memento, a folded note that recounts how the two elves tragically died.
Fifth Memento
From the cave, turn right and use Harding’s ability to move the stone. Climb the stone and continue straight. You’ll immediately come across three sentinels who will charge you. Defeat them and follow the path to the right, where you will then have to dodge more falling rocks. Right when you think you’re in the clear, more enemies greet you.
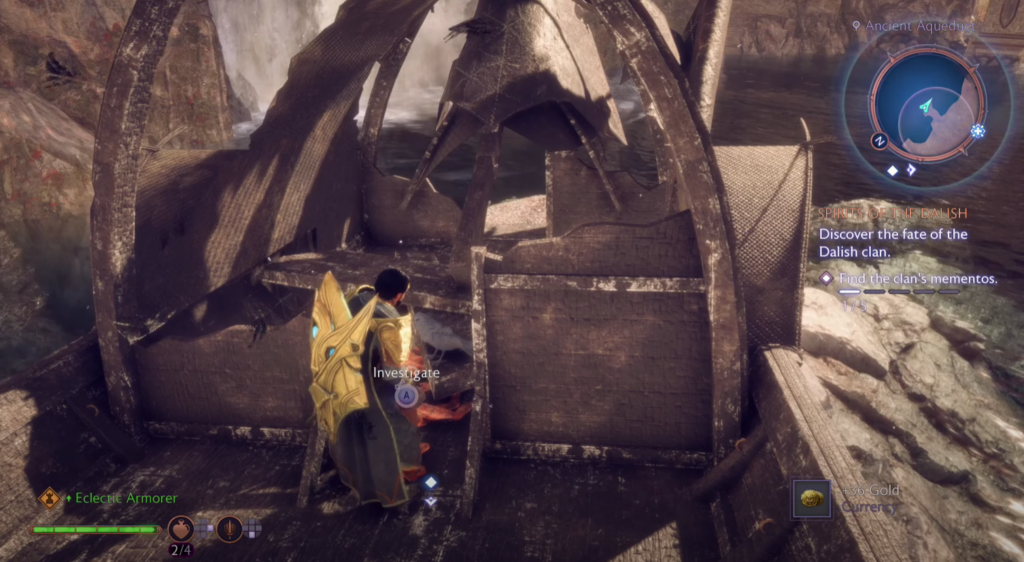
Defeat them and then investigate the wrecked boat in the middle of the water. A narrow path in front of it provides a way forward. You’ll have to jump from rocks to pieces of the broken boat to reach the end, where the final memento is located. Here, you find a burned corpse.
Return to the Spirit and Perform the Rite
Once you’ve collected all five mementos, return to the Anxious Spirit on the boat. The spirit is still distressed and one of your companions will suggest performing a gesture to help put it to rest. Your new objective is to perform a rite.
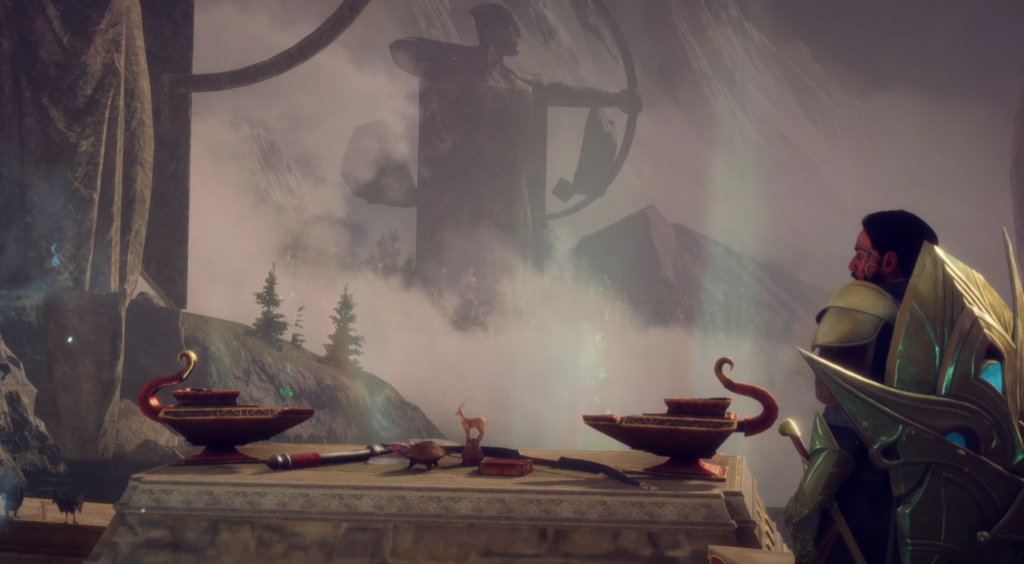
Leave the boat and take the path behind the Owl Statue. Use Harding’s ability to move the stone in your way and continue along the path. To your right is a broken trinket. Here, you can use Ballara’s tinkering ability to fix it and open a portal. Climb the rock that the trinket is on to get to the swirling portal and use Harding’s ability on the rock again. Go into the portal. This will take you to an altar where you can perform the rite. Once it’s completed, the Anxious Spirit thanks you for helping.
After completing the Spirits of the Dalish side quest, you’re rewarded with 500 XP, +100 Veil Jumpers Strength, and your bond will increase with the two companions with you.


")


